


There are many surprises in Windows 11, and Microsoft is trying to catch Apple’s lead. One similar feature on Windows 11 OS is Nearby Sharing. It sounds familiar to AirDrop and lets you easily share documents, photos, and other content with nearby devices using Bluetooth or Wi-Fi.
Microsoft does not enable this option when you first install Windows 11 on your compatible hardware. To enable Nearby sharing, you need to authorize it manually. We will be your guide in helping you to do so.
What is Nearby Sharing?
Nearby Sharing is not new. Microsoft rolled out this new feature as a part of the April 2018 update for Windows 10. Just like AirDrop, you can transfer content between nearby Windows 10 or Windows 11 PCs over Bluetooth or Wi-Fi. However, you need to enable it.
This feature is not as widely popular as AirDrop which allows sharing of content between iPads, MacBooks, and iPhones. However, Nearby Sharing does not support sharing files with smartphones and tablets.
Getting Nearby Sharing working: minimum requirements
- Have either Windows 10 or Windows 11 running on both PCs.
- Both PCs should be dual-band Bluetooth 4.0 (or later) with Low Energy (LE) support.
- Enable Nearby Sharing on both the PCs.
- Ideally, the donor and recipient should be near each other.
Microsoft Windows 11: Enabling Nearby Sharing
Here’s how to enable Nearby Sharing on your Windows 11 computer:
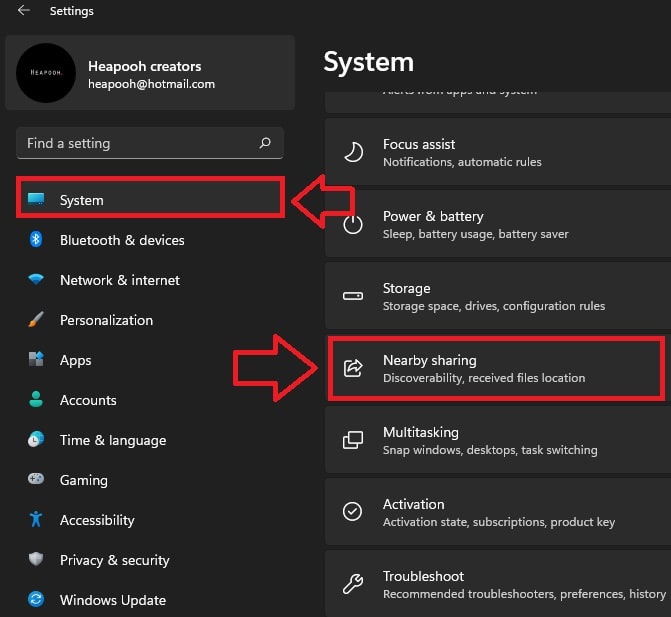
- By pressing the Windows key + I, you can open the Settings application in Windows 11. Next, select Nearby sharing from the right pane after clicking on ‘System’ in the left sidebar.
- You can choose to share files, photos, and links with all nearby devices or with just your device on the Nearby Sharing settings page. Preferences save automatically for future use.
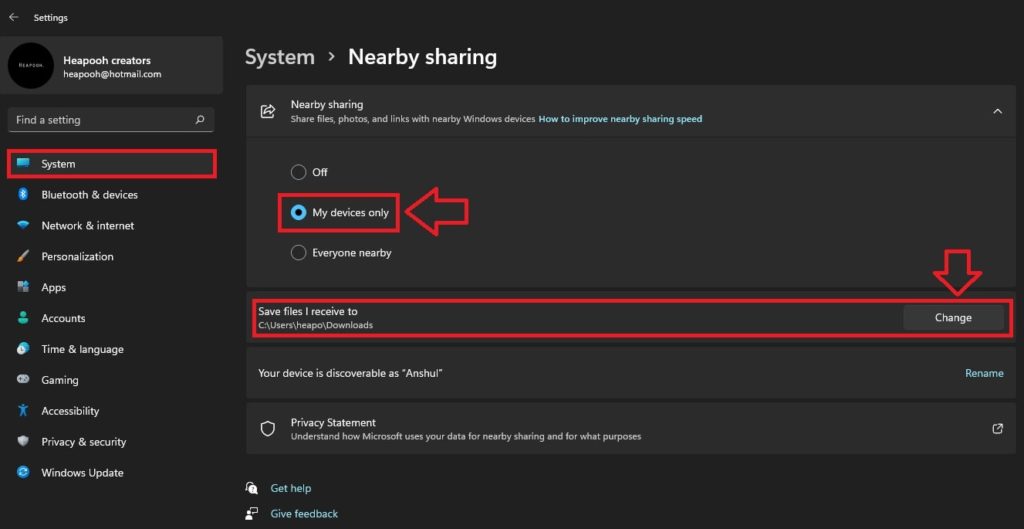
- The default destination for shared files is the ‘Downloads’ folder. On the Nearby Settings page, you can choose what folder you want to keep the files you receive by clicking the ‘Change’ button next to the ‘Save files I receive to’ option.
Share Files via Nearby Sharing in Windows 11
Here are the steps to follow after you enable Nearby Sharing.
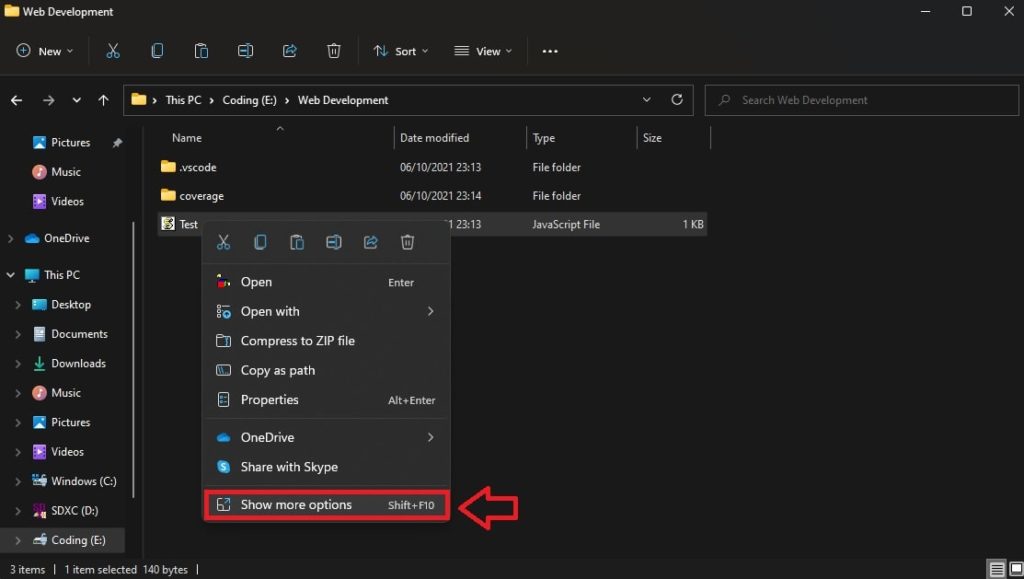
- Navigate to File Explorer or anywhere on your PC where you want to share your files.
- Select “Show more options” by right-clicking on the target file.
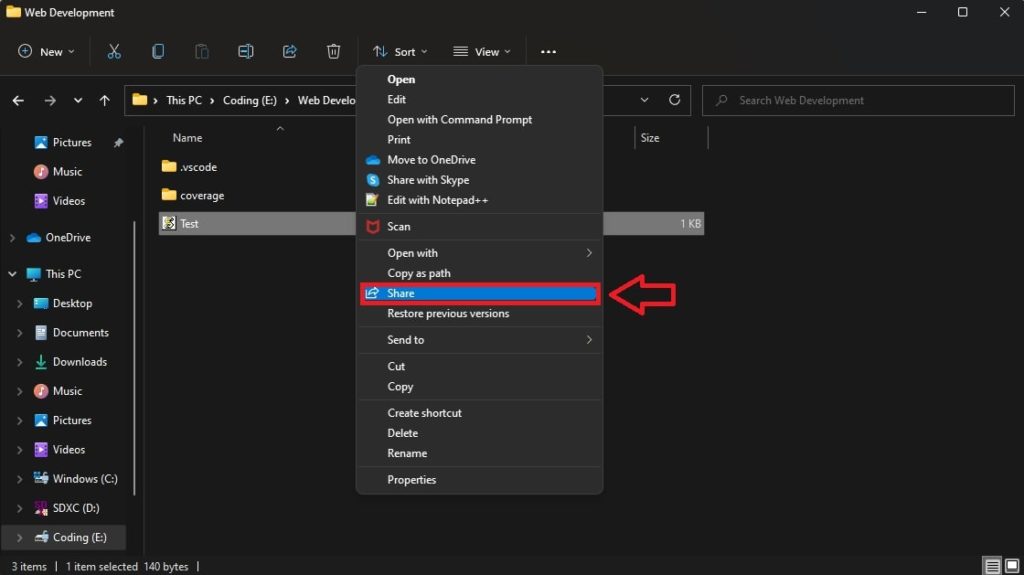
- Choose ‘Share’ from the context menu that appears next.
- Microsoft will ask you to check the device’s sharing settings if there are no available devices. You may select more than one device to share files with.
Using Microsoft Edge’s Nearby Sharing feature, share website links
Microsoft Edge now allows sharing website links using Nearby sharing. Follow the instructions below to share a web link on Windows 10 or 11.
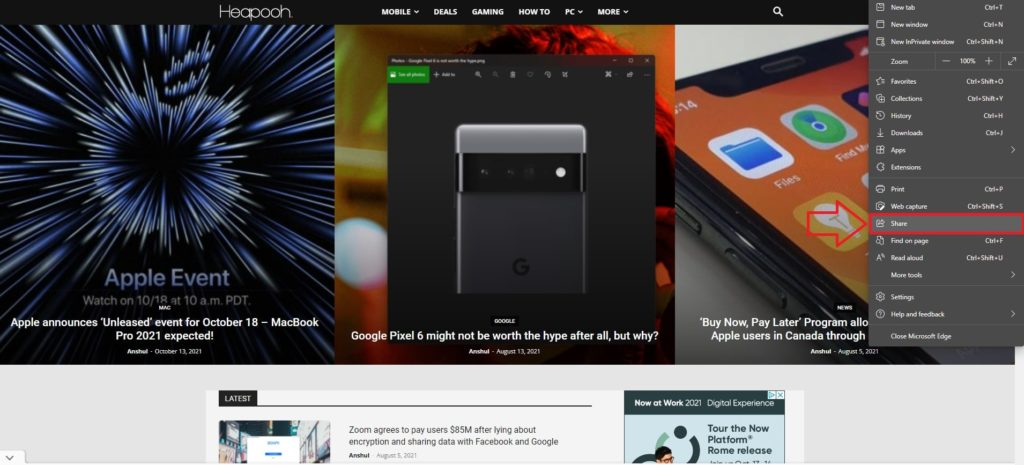
- To share a web page or website, open Microsoft Edge and go to the page. Select ‘Share’ from the drop-down menu by clicking on the ellipsis (three-dot menu button) at the top right.
- From the pop-up, select ‘Windows share options’.
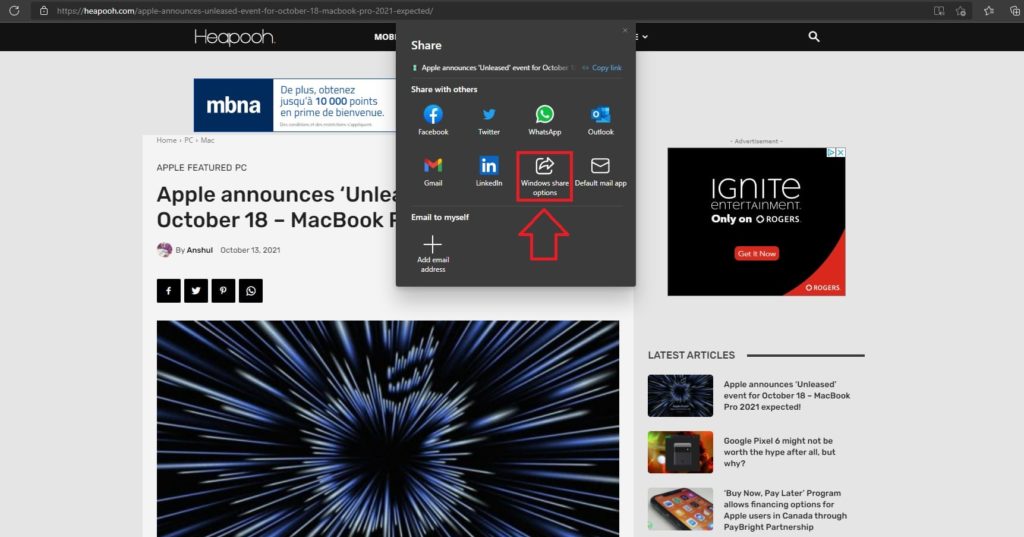
- Nearby sharing is the first option. Depending on your preference, you can share to your device only or to everyone on your list.

Using Microsoft Edge’s Nearby Share your favorite Media with your Mate
Microsoft gives users the option of sharing Media directly with a few default applications (for example, the ‘Photos’ application). To share your favorite photos with friends, family, and colleagues, follow these steps.
- Launch the Photos application and choose the Jpeg, Png, or Mp4 file.
- You’ll see a floating bar on top of the ‘Photo’ application when you left-click anywhere on the media.
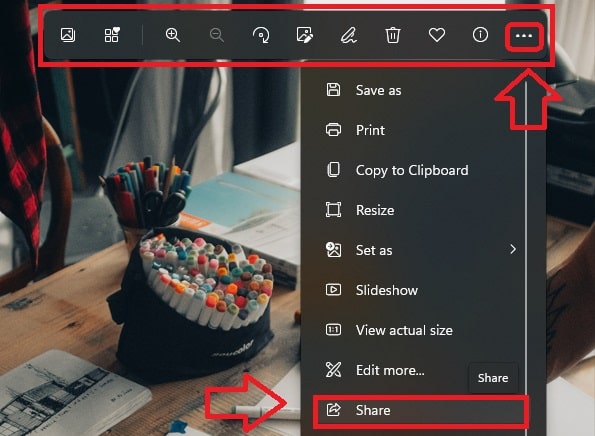
- Click on the share icon by clicking on the ellipsis (three-dot menu button) at the top-right.
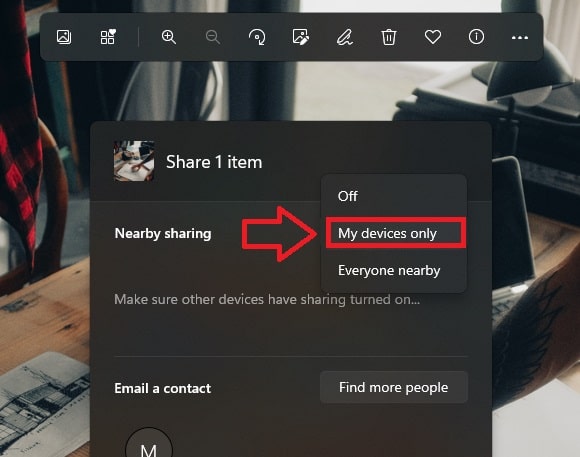
- ‘Nearby sharing’ is the first option.
- You can share only with your device or with everyone on your list, depending on your preferences.
Nearby Sharing lets you share content easily among Windows PCs. If you like this new Windows 11 feature, you can follow the detailed guide and let us know how it worked out for you.
We prefer to share media over Bluetooth when using Wi-Fi. The latter is often slower than Wi-Fi. The Wi-Fi connection must be the same for both devices, and the connection profile must be private in both cases. Navigate to Settings -> Network and Internet -> Properties -> Private.
The Nearby Sharing feature was useful for you, wasn’t it? Feel free to share your thoughts in the comments section below.
Well, if you liked reading this short article, you may want to read, “How to enable Windows 11 Taskbar on Windows 10?”. Check out our Article by clicking here.